logo
USE CODE “US04”

Acid Washing

An acid wash is, put simply, purposeful stripping of a tiny layer of plaster, exposing fresh plaster beneath. Therefore, it is ill-advised to make it an annual custom, which will accelerate the need for re-plastering. Most plaster coats (sometimes called whitecoat or marcite) are in excess of 1/2″, so a few careful acid washes should not hurt.

You may also decide on an acid wash not because of swamp conditions, but just to bring out a brighter, whiter finish. Mineral stains and/or deposits, chlorine stains, even dirt stains…an acid wash is always a dramatic aesthetic improvement.

If your pool has had years of algae blooms, and if your pool seems to grow algae overnight or just bloom very easily….changing the water and acid washing can help give you an algae free summer.

Acid is a dangerous substance. Pool company personnel are specially trained in its application and wear protective clothing and breathing apparatus during the acid wash. To protect our environment, the acid/water waste should be neutralized with soda ash prior to its being pumped to a safe location.

If you decide to drain and clean your own pool, make sure that the hydrostatic relief plugs are pulled as soon as possible, and that the water is pumped to a distant location, or into a storm drain. You may also need to check with local water authorities for waste water discharge regulations.

As you drain the pool, wash it down (scrub if necessary) to remove all algae and leaves. Bag up all leaves and debris in the pool’s bottom. When the pool is clean and empty, you can begin to acid wash the plaster. Put on protective clothing and rubber boots, goggles and wear a breathing mask designed for acid fumes.

Add 1 gallon acid to 1 gallon water (Always add acid to water, never the other way around). Wet down the wall with a hose. Keep the hose(s) running at all times, without a nozzle on it. Pour the acid/water mixture down the wall, from top to bottom, one 10 foot section at a time. Do not allow the acid to sit on the plaster for very long. Usually 30 seconds is long enough. Use an acid brush to scrub the surfaces and move the acid around. Rinse quickly and thoroughly.

Make sure acid is rinsed completely, as it will continue to etch the plaster. Also try to prevent the acid from wearing a channel path from shallow end to deep end. This can create a worn stripe on the floor.

If the 50/ 50 mixture isn’t strong enough, you can increase the acid strength or the hang time (before rinsing). Usually pools are acid washed twice with the same strength mixture. Remember that you don’t want to damage or “burn” the plaster.

After the acid wash, the bottom of the pool will be filled with a foamy, acid puddle. This needs to be neutralized before pumping out. Use 2 lbs of soda ash per 1 gallon of acid used. Broadcast the ash over the puddle while stirring with a pool brush on a pole. Use a small submersible pump with a hose to pump out the remaining acid water. Be careful where you pump it to. Even if properly neutralized, it may destroy plants or kill fish, frogs, etc. Rinse the bowl again, and re-pour the bowl of the deep end to clean up well around the drain, being careful not to burn the plaster too much.

Don’t rush the job and be safe. The fumes can be very strong, and very dangerous. Be sure to wear a respirator that will block muriatic acid fumes, goggles or safety glasses and protective clothing. Wear old shoes, or rubber boots. Spray off before exiting the pool. Transporting the acid from the store to the pool can be hazardous also. Secure the load in the vehicle. Always have a second person nearby when acid washing the pool. If acid drops enter the mouth or eye, rinse with the hose for 15 mins, without a nozzle on it. Acid on the skin won’t usually burn too much, just rinse quickly, for 30 seconds.

It is advised that you pay a service company to perform this for you.

Complete drain & clean charges average $3000. Higher costs may be seen for large amounts of debris in the pool, excessive neglect, or larger sized pools. Lower costs will be realized for clean or empty pools, or localized acid washings. If your water is from a well, you may elect to refill the pool with trucked – in water. Expect to pay about $150 per 5,000 gallons. If you refill from the hose; water costs are a few dollars per thousand gallons. Contact your water authority to let them know you are filling a pool and they may not charge you for the sewer, only the water portion of the bill.

Health Markets for your Aquatic Facility

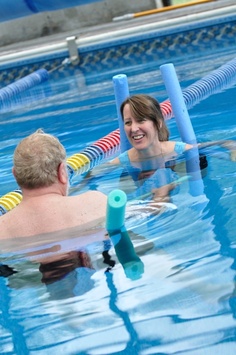
Health Markets for your Aquatic Facility to keep your appearance in tip top shape.  Simply being in the water is good for the body.

Issues that people have such as high blood pressure, poor circulation, difficulty in moving, and the like are all improved from immersion in water.

Here’s a look at different aquatic therapy and rehab markets that your facility can tap into…

Pediatrics. The need for children’s programs is growing with more autism, birth defects, cerebral palsy, sensory disorders, ADD / ADHD, etc. Children who grew up in earlier generations had no assistance because there was no diagnosis. Now many children have a “diagnosis” and are offered help. The pool is the ideal place for them.

Baby Boomers. Depending on whose numbers you use, baby boomers are between 52 and 66 years old. Most are healthy, but moving into the “aging issues” time of life. Baby boomers make up 30 percent of the U.S. population, and they need (or will need) the pool for their various aging issues. These issues include hip, knee, back and shoulder disorders or replacements. Many boomers have problems with balance and pain, and even more have had or will have strokes. All can benefit from being in your pool.

Obesity. There is an obesity pandemic in the United States and the water is the most comfortable and safest place for the morbidly obese and bariatric clients to exercise and rehab in.

Chronic Conditions. Finally, chronic conditions such as arthritis, fibromyalgia, MS and simple injuries from weekend warriors will keep this market growing.

CHILD SAFETY IS PARAMOUNT

CHILD SAFETY IS PARAMOUNT!  Should a guardian elect to remove or not utilize the life jacket, the child should remain within arm’s reach of the guardian at all times. The guardian will be asked to sign a release and liability waiver explaining the child safety policy and the risks associated with the removal of the personal flotation device.
Children who pass a swim test are issued a green wristband. The child’s name is documented in the facility Child Safety Log signifying that the child is not required to wear a life jacket or be within arm’s reach. Any child listed on the Child Safety Log can be asked to perform a swim test during any visit should a lifeguard deem it necessary.

The CSP was developed to protect the highest risk demographic — young children who cannot swim. We implement the policy at all of our commercial locations, and we have configured it as a contract requirement.

In 1978, an individual could drive down the freeway with no seat belt, an open container of alcohol, and their 4-year-old child riding shotgun. Lawmakers have since studied statistics to recognize these actions as dangerous behavior. Therefore, laws were developed prohibiting drinking and driving, requiring the use of a seat belt for all passengers, and obligating a 4-year-old to be placed in a child safety seat located in the back seat of a vehicle. The experts established regulations to protect society and provide comprehension of the do’s and don’ts when driving a car.

The state of Texas requires children under the age of 13 to wear a life jacket when on a boat. Seems logical — if the child falls into the water, he or she will be safer with a life jacket. Why would we not want to create the same safety benefits at a swimming pool? There seems to be a false sense of security that is generated because the water is clear and objects can be seen at the bottom. It must be safe, isn’t it? Don’t be foolish, a pool is just as dangerous as the largest ocean and has the ability to steal a life in seconds.

It is our duty as aquatics professionals to provide procedures that prevent drowning. We are not here to parent or a guardian we are here to help protect. Children can be elusive and slip away while having a 15-second conversation with a friend at the pool. This doesn’t constitute poor parenting; it only means that we are all susceptible to a kid being a kid. The greater the number of facilities utilizing CSP, the lower the drowning statistic becomes, and ultimately the more lives we save together.

As industry leaders, we cannot wait for federal, state or city laws to make serious changes to the way we operate facilities. We challenge all aquatics professionals to answer the call to action. Join us in creating a new standard for aquatics management.

Safety Check!

Safety Check!

You’re not ready for the new season until you complete this risk- management checklist.

With everything from hazardous chemicals to heavy equipment, aquatics facilities are a potential land mine for risk managers. Here’s an opening season checklist to help you diffuse safety issues before they become explosive.

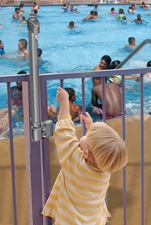
Inspect barriers. Ensure that chain link hasn’t been cut and vertical rails in fencing are no more than 4 inches apart. Use a tape measure. Your eye may not detect a quarter inch of additional space, but that little bit of extra room may be all a child needs to squeeze through and into your facility. Avoid ornamental fencing with horizontal members because youngsters may find this tempting to climb. Likewise, do not position benches next to fences. This can give a climber just the boost needed to get up and over your fence. Make sure all gates open outward, are self-closing, and have latches installed out of the reach of children.

Updaterecords. Contact the Health Department, the Agriculture Department and any other government agency for which you must maintain records. Ask for a copy of their report forms. Use this as a basis for the records you keep at your facility. Make sure logs are filled out accurately and consistently — they may be your best defense if an incident leads to litigation. Train your staff on what to include and what to exclude on chemical test logs and incident reports. Facility records should be limited to facts; opinions should be saved for staff discussions.

Run In-service training. This should be done with the entire staff before opening the pool for the season, and then regularly throughout the season. Emergency skills should be practiced in the setting where they’ll be used. Ensure that all equipment is operational and all certifications are up to date.

Check signs. Make certain that signage meets code, is properly positioned and easy to understand. Measure water depth and check to see if depth markers are correct. Install the international “No Diving” symbol alongside each depth marker in shallow water. At emergency telephones, place signage that indicates whether callers should dial “911,” “9-911” or just lift the receiver and listen for Emergency Services to respond.

Review chemical stock. Call the Agriculture Department to pick up chemicals that should be disposed of. Store fresh chemicals in their own containers or in new storage vessels. Do not combine chemicals to save storage space. And do not store incompatible chemicals — for example, chlorine and acid — in the same area. Check with your fire marshal to determine how much flammable material may be stored on site. See to it that fire extinguishers are full, and emergency stations for eyewashes and showers are flushed out. Update your MSDS manual.

Enlist experts. Use them for technical assistance with electrical and gas-powered equipment. Have an aquatic safety expert review your facility’s emergency action plan and do a thorough site inspection each year. If diving boards, slides, chemical feed equipment or filtration equipment need service, contact the manufacturer for a list of certified service providers. Doing the work yourself could save money in the short term, but may open you up to unnecessary liability.

Take measure. Measure the length, width and depth of each pool, and calculated gallonage. Just as a doctor must know your weight to properly prescribe medicine dosages, you must know how much water is in your pool to determine proper chemical dosages. Invest in a new test kit each year, and read and follow all directions. Test the incoming water as well as the pool water so you can anticipate the effect of fill water on pool water balance.

Examine pool inlets and outlets. Main drain covers should be intact and securely fastened. Also remember to follow new federal pool legislation regarding drain covers. Eyeballs on wall inlets should be angled to direct circulation toward dead spots. Floor inlets should not present a trip hazard. Vacuum outlets should have self-closing covers, and grates should be free of cracks and chips that could result in injury. Skimmer covers, baskets and weirs should be inspected for damage and replaced if necessary. A skimmer without a weir cannot function properly.

Visit the CDC’s Web site. Review the new Fecal Accident Response Recommendations (revised December 20, 2007) and update your facility’s procedures accordingly. Contact local and state regulatory agencies for their directives as well. Click on the “Health Promotions Materials” link and download brochures and posters for use at your facility. By educating your staff and the public, you can reduce the chance of disease transmission at your facility. www.cdc.gov/healthyswimming

Test flow meters,and pressure and vacuum gauges. Are they intact and properly installed? Replace gaskets or O-rings on pump strainers annually to ensure that lids seal tightly. Likewise, replace rubber parts on chemical feed equipment each year and inspect plastic parts for degradation due to chemical contact. Clean vent covers in chemical storage rooms and equipment areas. Ensure that air exchange rates meet standards and that chemical storage room air is not vented into the pool area.

Jacket Required

Life jacket required.  Over the years, we have experienced a great deal of criticism from guests, and even fellow aquatic managers, for policies requiring life jackets for younger guests.

But despite the flak I’ve taken over this policy, I’ve stuck to it and will continue to do so. I urge all aquatic facilities to adopt similar policies.

After all, children in every state are required to wear seat belts and/or be in car seats at a certain age. In many states, helmets are required when riding a bicycle. These laws are for children’s welfare.

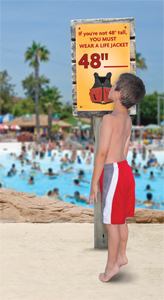
So it goes with our life jacket policy, which states that an adult 18 years or older must be present with a child under 48 inches tall, and that child must wear a life jacket in all water attractions. In other words, a 10-year-old sibling, cannot take a 6-year-old down a slide without a parent. This life jacket policy puts responsibility of the child’s care squarely back on the adult, which allows us to run a aquatic facility and not have to “baby-sit” a single child.

Too harsh? Not when you consider that a life jacket is sometimes the only thing standing between drowning and safety. In fact, I like to think of our life jacket policy as a safety net because mistakes happen, whether from lifeguards or parents.

And because aquatic facilities can get crowded, life jackets make even more sense. For instance, our facility is popular with camp groups, which come from a three-state area. These groups include inner-city youth programs, which bring in children who don’t know how to swim. Indeed, it is not uncommon for our staff to be asked if it is OK for non-swimmers to go down the slides.

Even with all these very good reasons to enforce a life jacket policy, we encounter resistance. Here’s how we have dealt with it at our facility with much success:

Provide free life jackets around the facility (excluding infant life jackets).
Rent infant life jackets, with a full refund upon return
Sell life jackets to those who want them. (You may be surprised how many people choose this option).
Allow guests to bring their own life jackets, as long as they are Coast Guard-approved, and no inflatable of any kind.
Put wristbands on guests under 48 inches tall, which are a different color than the over-48 inch bands so attendants and guards have a visual reminder.
Don’t allow any under- 48-inch children past the 3-foot line in the pool.
Permit infants to ride in a lazy river only if they’re wearing life jackets and are in adults’ laps. And any infant who is held by an adult can partake in any kiddies areas.
Even with these clear policies, we do have a few gray areas we occasionally face concerning children with autism and youngsters with sensory disorders. But these children usually are in constant connection with their caretakers. In those cases, we allow the caretaker to wear the different color wristband. Usually, we also can get the child into a life jacket.

Otherwise, the biggest hurdles we face with the “Under 48 Inch Rule” are parents with children who fight them on the issue. In these cases, we are sometimes called in to be the “bad guys” and enforce the rules, which can be done in a teacher-like way — and most of the time works out. It becomes a bit more difficult with children who are small for their age while their cousins and friends are bigger.

Finally, we have a 1-inch leeway that lets parents make the call whether their children should wear life jackets. This is particularly interesting when the adult wants to pay the under-48-inch price for a child who is clearly over. We allow this, but most of the time the adult comes back for an upgrade to the adult ticket because we require that anyone under 48 inches be accompanied by an adult on all rides and water-features.

For those rare times when the parent and child become inconsolable over our policy, we do not hesitate to offer a rain check or refund. But we do not bend the rules because this is a safety issue. This is our facility’s most serious safety policy, and it is not negotiable. Many times I have said to parents, “In your backyard you can do whatever you want. In my backyard, these are the rules. We have everyone’s children to watch, not just yours. We are operating an aquatic facility and we strive to provide a safe, fun environment and experience.”

Shallow Trouble?

With large aquatics centers and waterparks increasing in popularity — many featuring zero-depth entries, splash pads and more shallow-water attractions — more and more people are able to experience and enjoy water in new ways.  But are you staying away from Shallow trouble?

However, this also presents new challenges to pool and waterpark visitors, who mistakenly think they aren’t at risk of drowning at a shallow depth or with moving water.

Many guests, often adults and adolescents, are non-swimmers and don’t even know it. This is a scary scenario for any aquatics operator.

Large waves in the wave pool, currents in the lazy rivers, and the disorientation associated with going down slides with twists and turns, often is underestimated and can present a huge danger.

As an aquatics director, we’ve seen a 50 percent increase in adult assists and active saves in the past six years. In many cases, lifeguards are helping a person who is taller than the water depth in which he or she is getting rescued. The embarrassed, but grateful, patron often offers a common explanation, “I lost my footing and panicked.” In these cases, lifeguards often help the person merely stand up.

This lack of respect of the water can potentially place children at greater risk, too. Parents or camp counselors are less attentive because the water is shallow. The vast majority of the active saves of children now have been related to an unattended child who got into water that was too deep. Well-intentioned parents or counselors may tell a child to stay in the shallow area. But those of us who work in aquatics know the lure of activity pools’ many features are just too enticing for kids to resist. They easily wander and explore — often to deeper water.

Similarly, lifeguards sometimes need to rescue a child wearing a Coast Guard-approved safety vest. While safety vests are wonderful tools for parents to help protect their children, they are no substitution for adult supervision and often provide a false sense of security. I’ve seen children wearing life jackets incorrectly needing assistance. More frequently, children are unable to roll from front to back or vice versa while wearing the life jackets, resulting in submerged mouths and noses.

Because of the increased saves related to the misconception that shallow water is without safety risk, consider some of the following basic operational procedures as a start toward reducing the risk and combating the problem:

1 Maintain accurate signage. Warn all swimmers that slides and attractions can cause disorientation and that “shallow” water is equally as dangerous as deep water because of changing depths, currents and other factors.

2 Implement a “within arm’s reach rule.” All children under 48″ are required to wear a wristband, given upon admission to the park with a message on the band to remind parents to stay within arm’s reach anywhere on the pool deck or in the water. The wristband also is an identifier to lifeguards of younger and weaker swimmers.

3 Forbid unattended children. Do not allow children under 13 years of age to enter the facility without an adult at least 18 years or older. (Often children who are 9 or 10 years old are lured to areas of the pool by friends to try things they are not prepared for. Adult supervision is needed to prevent this.)

4 Test and identify. If your facility contains slides or attractions, give to all children wristbands that indicate they are the appropriate height or have the swimming ability to use the equipment. Do this by having a swim test area and height check station. The slide operator still should do a second check for height, but this helps lines move quickly and prevents children who are too small from gaining entry to a slide or attraction for which they are not yet ready. These lines are a common place for children to be separated from their parents, but more importantly, can reduce the lure of nonswimmers if they have been denied the band.

5 Use consistent flotation devices. Do not allow flotation devices other than a Coast Guard-approved (properly fitting) life jacket. In addition, do not allow children who require life jackets to ride slides, use diving boards or be in water over their heads. Soon they will be going down the slide without the jacket and will need to be rescued.

6 Train guards in shallow-water rescue. It must be stressed that the shallow water can carry as much risk, if not more, than deeper areas of the pool. Lastly, encourage swim lessons for all children. Swim lessons are valuable and necessary training for all ages. This training can make all the difference between a fun or miserable day at the waterpark or pool.

National Model Swimming Pool and Spa Code

Are you current with the National Model Swimming Pool and Spa Code?   CDC, through an initial grant from the National Swimming Pool Foundation, is working with public health and industry representatives across the United States to prevent drowning, injuries, and the spread of recreational water illnesses at public swimming pools and spas by building a Model Aquatic Health Code (MAHC). The MAHC will serve as a model and guide for local and state agencies needing to update or implement swimming pool and spa code, rules, regulations, guidance, law, or standards governing the design, construction, operation, and maintenance of swimming pools, spas, hot tubs, and other treated or disinfected aquatic facilities.

In the United States, there is no federal regulatory authority responsible for disinfected aquatic facilities (e.g. swimming pools, water parks, etc.); all pool codes are developed, reviewed, and approved by state and/or local public health officials. As a result, there are no uniform, national standards governing the design, construction, operation, and maintenance of swimming pools and other treated aquatic facilities. Thus, the code requirements for preventing and responding to recreational water illnesses (RWIs) can vary significantly among local and state agencies. The Model Aquatic Health Code (MAHC) is intended to transform the typical health department pool program into a data-driven, knowledge-based, risk reduction effort to prevent disease and injuries and promote healthy recreational water experiences. The MAHC should ensure that the best available standards and practices for protecting public health are available for adoption by state and local agencies. It will provide local and state agencies with uniform guidelines for the design, construction, operation, and maintenance of swimming pools and other disinfected aquatic facilities.

This effort stems from a CDC-sponsored workshop called “Recreational Water Illness Prevention at Disinfected Swimming Venues” that was convened on February 15-17, 2005, in Atlanta, Georgia. The workshop assembled persons from different disciplines working in state, local, and federal public health agencies and the aquatics industry to discuss ways to minimize recreational water illnesses spread through disinfected swimming venues. The main recommendation from this workshop was that CDC sponsor a national partnership to create a model guidance document that helps local and state agencies incorporate science-based practices into their pool programs without having to “recreate the wheel.” CDC has been working with public health and industry representatives across the United States to build this effort. Initial efforts have been focused on reducing the spread of recreational water illnesses and injuries at disinfected aquatic facilities.

Chipping Away

Chipping Away

We discuss how.

Part of the way

Crews using a bond coat must perform a partial chip-out.

It’s important to remove the plaster immediately under the tile line and around fittings. This allows the plaster or exposed aggregate to be gradually feathered in and wrapped around penetrations, so that they are at the same elevation and prevent leakage or water migration behind the tile.

To chip around the tile, professionals saw cut at least once immediately underneath to allow the material to come off cleanly. This causes the least damage to the tile. Some just cut immediately under the tile, at the joint. Others add a second saw cut, running parallel anywhere from 3 to 12 inches below. Then they knock out the material between the two saw cuts.

When you make two cuts and hit it with the jackhammer, it comes out in a small section. It’s more of a controlled area that you’re taking off. That whole piece comes off. After that, I can get a lot more aggressive for the next few inches down. Some use an angle grinder to make the cuts while others uses hand grinders with a 4-inch diamond blade.

Skipping this step can damage the tile over time. There are guys who won’t undercut, won’t chip, and they just roll the new finish into the existing tile. That runs into a potential problem with water getting down behind the new finish because you’re not really sealing off the top of that new finish. You’re basically exposing it to water penetration.

When doing this, only cut about as deep as the tile. Professionals know the tile is only 3/8-inch thick, so that’s all they’re going down. They’re not cutting any deeper than they have to.

How far to cut beneath the tile depends partly on what type of finish is being used. Plaster and finer exposed aggregates only need to be applied about 3/8-inch thick, so it’s fine to chip out less of the existing plaster underneath the tile. However, when dealing with a pebble finish or other material that must be applied more thickly, a greater amount of space should be opened up underneath the tile. This gives plasterers more room to gradually feather in the material until it sits flush with the tile surface.

Crews use a similar technique around the fittings, placing a cut approximately 6 inches outside the fittings and then removing the finish material. For floor returns or in-floor cleaning heads, some professionals prefer to cut approximately 12 inches.

Next, crews must check for areas where debonding, commonly called delamination, has occurred. These are nicknamed “hollows.” To find them, drag a chain or rod, such as a piece of rebar, across the pool and listen for a different sound. It’s scratch, scratch, scratch — just like you’d imagine from dragging a chain on the floor — and then you hit a hollow area and it sounds like you’re tapping a bucket. It creates a very hollow resonation, and that’s the separation between the top layer of plaster and the underlying substrate. When doing this, workers can run the chain or rod in a “V” pattern across the whole pool.

The full chip-out

There are other times when even those who prefer the bond-coat method will move to a full chip-out. If it becomes apparent that there are multiple layers of plaster in the pool, you will need to remove everything. You want to go ahead and chip off the top two layers so you come back with one.

Whether performing a complete or partial chip-out, certain techniques will help crews remove the plaster while leaving as much shotcrete or gunite intact as possible.

The most frequently made mistake is rushing the job, experts say. After all, not only is it more profitable to get out and on to the next job, but the work is terribly hard, leaving some to want to get it finished.

When you consider that an average pool uses about six batches of material, and a batch weighs 1,000 pounds, that’s three tons of aggregate and cement. When you’ve got a full chip-out, that means, by hand, you’re chipping up the plaster into chunks, scooping it up into 5-gallon buckets, and carrying every bit of it out by hand. It is brutal work.

However, rushing through can lead to removal of too much material. In an effort to speed things along, some will use stronger jackhammers than are necessary, and inadvertently cut into the shell. Use a 60-pound [pneumatic] hammer, and that will do less damage or use the 90-pound jackhammers when we’re doing heavier-duty work like breaking up concrete decks.

Crews also should work with a flat chisel rather than a pointed one, although it’s slower. This reduces the number of pocks pounded into the shell and helps control the amount of material that’s removed. A lot of guys who we run into use a pointed chisel to expedite the process, and it really does a lot more damage than just the flat chisel. The flat chisel, it’s kind of like shaving — you can run a flat chisel along the wall more effectively and just kind of take off what you need. Somebody who would use a point, when they hit it on the wall, it kind of splatters in all directions.

Workers can use wider chisels — 6- to 7-inches — on the floor, and go with a smaller held-held gun for the walls, steps and benches to protect the tile and fittings.

Optimally, the flat chisels should be held at an angle of approximately 45 to 60 degrees to chip slightly sideways. Every time you go straight down you’re creating a divot.

Floor work can be done with the chisel held at less of an angle.

Another key to removing the material efficiently with minimal damage is to frequently sharpen the tools. This makes it easier to strip the existing finish, and creates less damage underneath. You want to keep your points and chisels sharp and have a lot of pressure on them, so they can work quickly and don’t do any more damage to the surface than they have to.

It’s difficult to say how often a tool should be sharpened, because some finishing materials are harder than others. However, all points and chisels should be sharpened before each job. When removing harder surfaces such as pebble, crews will need to sharpen more often. Once the pool has been chipped out, some crews like to acid wash the area in order to remove any remaining residue. But this should be avoided. They’re literally taking off the top layer of cement and making that gunite kind of sandy, which inhibits the ability of the plaster to bond to it.

TIPS
1. If the pool or spa has more than one layer of plaster, consider a complete chip-out to ensure a better bond. This also applies when a large amount of the finish has debonded.

2. Use a flat chisel rather than a pointed end, holding it at an angle. This helps control the plaster removal and minimizes gouging of shotcrete or gunite.

3. When chipping around tile, tape over it to protect it from the jackhammer. Also use lighter, less powerful equipment to ensure it doesn’t shatter the tile.

4. Sharpen the tools as often as necessary — at least once per job for plaster and a few times when stripping a harder material such as pebble.

Aquatic Center Pools In Need Of Change

Is your Aquatic Center Pools In Need Of Change?  How can you differentiate your pool from the shiny new water park that was built a couple of miles away? Think about offering community events at your facility. A family movie night at the pool, a community picnic with a theme are a couple of examples that will help draw interest to your pool. Think outside the box when looking for ideas. No, scratch that, there is no box. Be creative and involve everyone within your staff to come up with ideas. Generally lifeguards are younger and can have great insight into what will draw the younger crowd as well as what it keeping them away.

Gone are the days where a basic lap pool is enough to generate the needed revenue to support the cost of operating a community a pool. It is essential that each facility takes into consideration what their patrons are looking for. What are the current members looking for from your facility? What age groups do you want to target for new memberships? Do you want to make your facility more family oriented, or is there another demographic you are looking to attract?

These are all important questions that you have to ask in search of what will work for your facility. Water features provide a way for you to bring your facility back to life and generate needed additional revenue. First you must review your existing features such as diving boards and slides to evaluate their current usefulness as well as safety concerns. There are a great deal of options that can make your facility more appealing to existing member’s while attracting new membership.

Aquatic Center Pools In Need Of Change
Water Feature for Aquatic Centers

Here are some considerations when looking to add water features to your existing facility.

Do you have the available space for your water feature?
What footprint will the feature take up?
Can your feature be updated to keep it challenging?
Cost is certainly a concern but you must consider the return on investment.
When should you add the feature to make the biggest impact
How are you going to get the word out about your new feature?

Aquatic Center Pools In Need Of Change
Swimming Pool

We are always talking to our customers about what they are doing to increase the buzz at their facilities. Adding new programs and features seem to be the constant mantra from all of them.

What are you going to do differently to ensure success at your aquatic facility? Isn’t it time that you think about what you can do to make your facility success? I would love your feedback on what has worked for you and what has not.

Federal Code Hits Final Stretch

The Federal Code Hits Final Stretch for safety in the aquatic industry.  Fourteen of the committees were placed in charge of writing a document, called a module, covering different subject areas. Those included facility design and construction; recirculation systems and filtration; disinfection and water quality; risk management and safety; facility maintenance and operation; monitoring and testing; contamination burden; hygiene facilities; fecal/vomit/blood contamination response; operator training; lifeguarding and bather supervision; regulatory program administration; ventilation and air quality; and preference/user guide/definitions.

A steering committee was put in charge of reconciling any contradictions and overlap between the modules.

Soon the public will be given its final chance to comment on the work. Over the past few years, a draft of each module was released for comment and the CDC has been deciding how to address concerns raised by the public. The sections will be woven into a single document and made available for review, which is expected to take place as early as February. This public comment period will last 60 days.

The finished code is expected to be published in late 2014.

Those involved in writing the guidelines want to see requirements for public pools standardized around the country.

The hope is that the MAHC would ultimately be adopted in multiple states and … get the codes consistent, and also that the code would be based more on science and good practice rather than “We’ve done it this way since Noah”.

Expect the new codes to be universally sound rather than based on local bias. For instance, the last version of the Disinfection and Water Quality Module proposed free available chlorine levels of at least 1 part per million.

Currently you see differences in local codes. In Pennsylvania, you can have 0.4 ppm chlorine; in Delaware, you could have 0.5. But in Jersey it’s 1.0 minimum. Frankly, the bacteria being killed at 1 ppm don’t recognize the state lines.

The language is not expected to have much of an effect in states that are already heavily regulated, such as California. However, officials in the Golden State have already begun borrowing from the not-yet-published code by incorporating language from the initial drafts into its own code relating to the maintenance and operation of public pools, Title 22.

Instead, officials and volunteers say the prime candidates for the MAHC are states with little to no regulation, those following outdated codes, or that simply don’t have the budgets to develop their own.

But even in states that don’t adopt the MAHC, should expect the model code to affect individuals or companies that are sued in the case of an accident. The MAHC is establishing a widely available [set of] best practices. If somebody is operating a public facility, ignorance of the MAHC is not going to be an effective defense in case of an accident.